Probing and Tool Length Offset
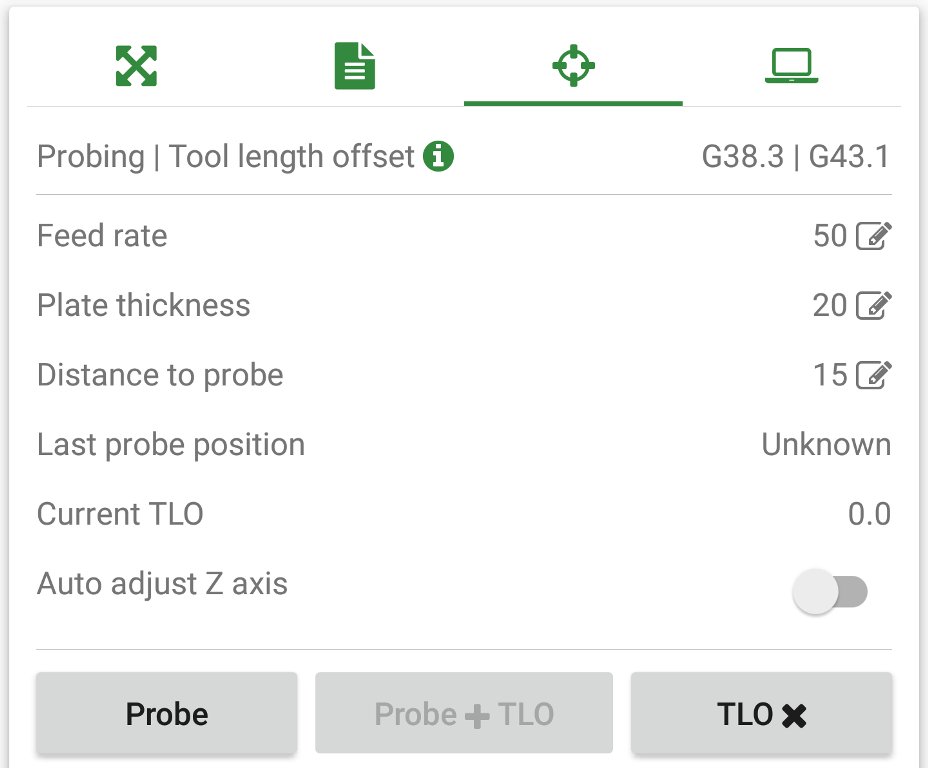
Figure-1: Probing and Tool Length Offset
Probing with G38.3
probe towards the workpiece, stop on contact
Application supports only one probing mode with Z-Axis ie G398.3, any additional probing requirements can be full filled via custom buttons or from console window
-
Feed rateFeed rate at which Z axis will move towards the workpiece. -
Plate thicknessThickness of the probing plate. (It should be given in your current machine units, you can see the current status in machine status panelG21 - InchesG20 - Millimeters) -
Distance to probeMax probing distance before Z axis returns to its initial position. (It should be given based on your machine current distance mode, you can see the current status in machine status panelG90 - absolute distance modeG91 - incremental distance mode) -
Last probe positionThe last successful probe position of Z axis. -
Current TLOAmount of current Z axis tool length offset value. -
Auto adjust Z axisIf turned on and probe is success, application will set the Z axis position to zero in current coordinates. (Also known as auto zero) -
ProbeStarts the probing cycle. -
Probe + TLOStarts the probing cycle and applies TLO if probe is success. -
TLOCancel current TLO if any.
Manual tool change with G43.1
procedure for using tool change with tool length offset on Z axis
- Move the machine to a safe position.
- Do your probe set up. ( placing the touch plate below the tool and attaching probe clip to tool etc.. )
-
Do a successful
probewith your first tool withAuto adjust Z axisis set to off - Now change the tool.
- Do your probe set up for second tool at the same place. ( placing the touch plate below the tool and attaching probe clip to tool etc.. )
-
Now do a probe with
Probe + TLO - After a successful probe, TLO is applied to Z Axis with a difference of current probe position and last probe position.
- Verify everything to be okay before continuing.